كيفية ضبط إعدادات L2TP VPN على ويندوز 8.1
يناير 23, 2017, 4:30 ص
افتح قائمة Start
وفي حقل البحث Search أدخل عبارة Internet Options
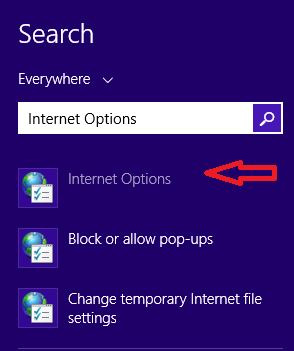
اضغط على الخيار الأول الذي ظهر لك لتظهر لك نافذة، اضغط على Connections
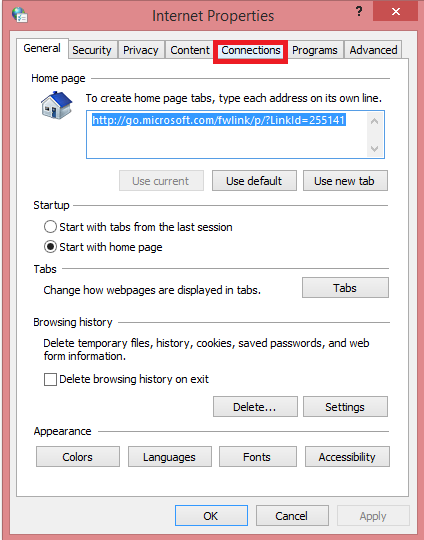
والآن اختر Add VPN
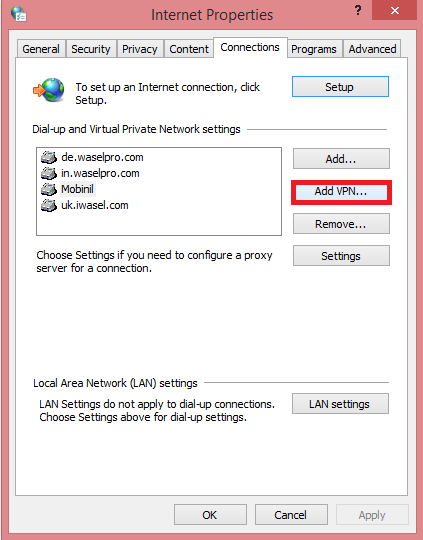
في كلا من حقلي Internet Address و Destination Name أدخل عنوان خادم VPN الذي تريد الاتصال به من (مثلا: ru.waselpro.com) ثم اضغط Create
*ادخل على صفحة حسابك في موقع waselpro.com لترى قائمة خوادم L2TP المتاحة
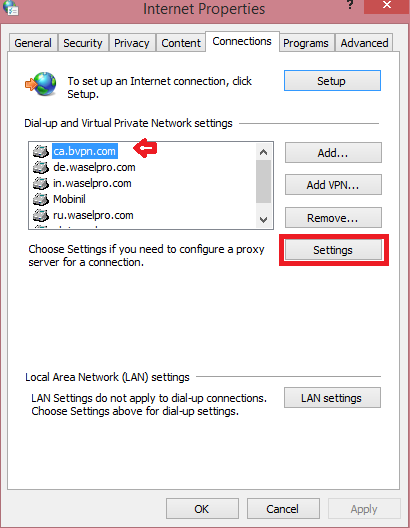
الآن اختر عنوان الخادم الذي قمت بإدخاله من قائمة الاتصالات ثم اضغط Settings

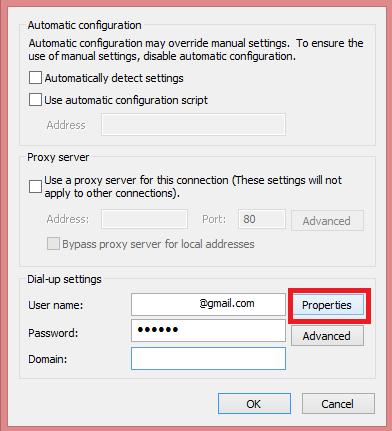
أدخل عنوان البريد الإلكتروني الخاص بك المسجل في واصل برو في حقل Username وأدخل كلمة المرور في حقل Password

اضغط Properties
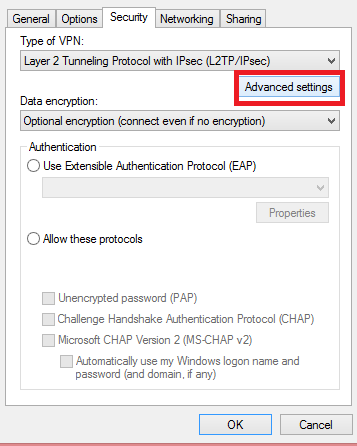
لاختيار Type of VPN اختر Layer to Tunneling Protocol with IPsec (L2TP/ IPsec)

اضغط Advanced Settings
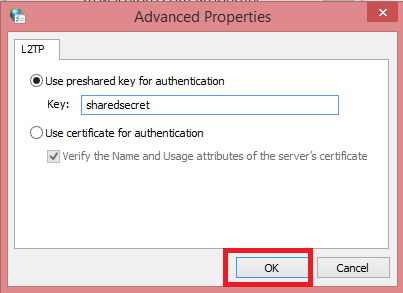
اختر Use preshared key for authentication ثم أدخل كلمة sharedsecret ثم اضغط OK
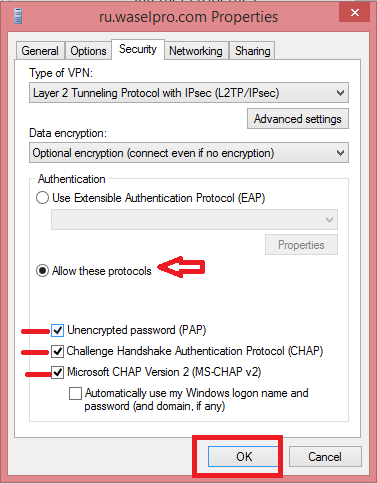
اضغط Security ثم اختر Allow these protocols وضع علامة بجوار جميع الخيارات ثم اضغط OK
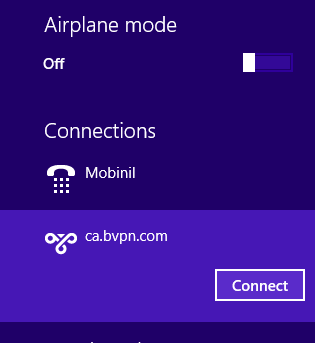
اضغط يمين الفأرة على أيقونة الاتصالات في شريط المهام أسفل الشاشة

انقر مرتين على اسم الاتصال الذي قمت بإنشاؤه بعنوان الخادم
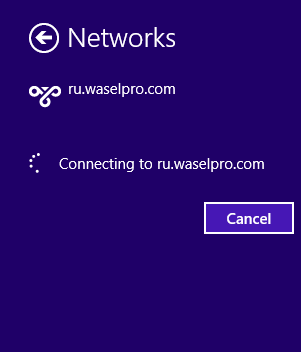
أدخل اسم المستخدم وكلمة المرور مرة أخرى ثم اضغط OK

سيتم الاتصال في غضون ثوان
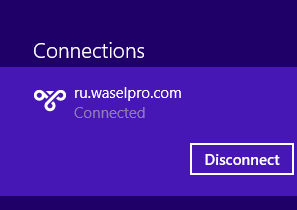
الآن تم الاتصال


 الرئيسية
 التحميل
 الدعم
الدعم اتصل بنا